How to EC2
Launching and connecting to an Amazon EC2 instance is surprisingly confusing. I ran into a few gaps working through this Docker tutorial that I wanted to share. This section explains how to launch an instance fairly well, but you may encounter a couple of gotchas before you are able to connect using SSH.
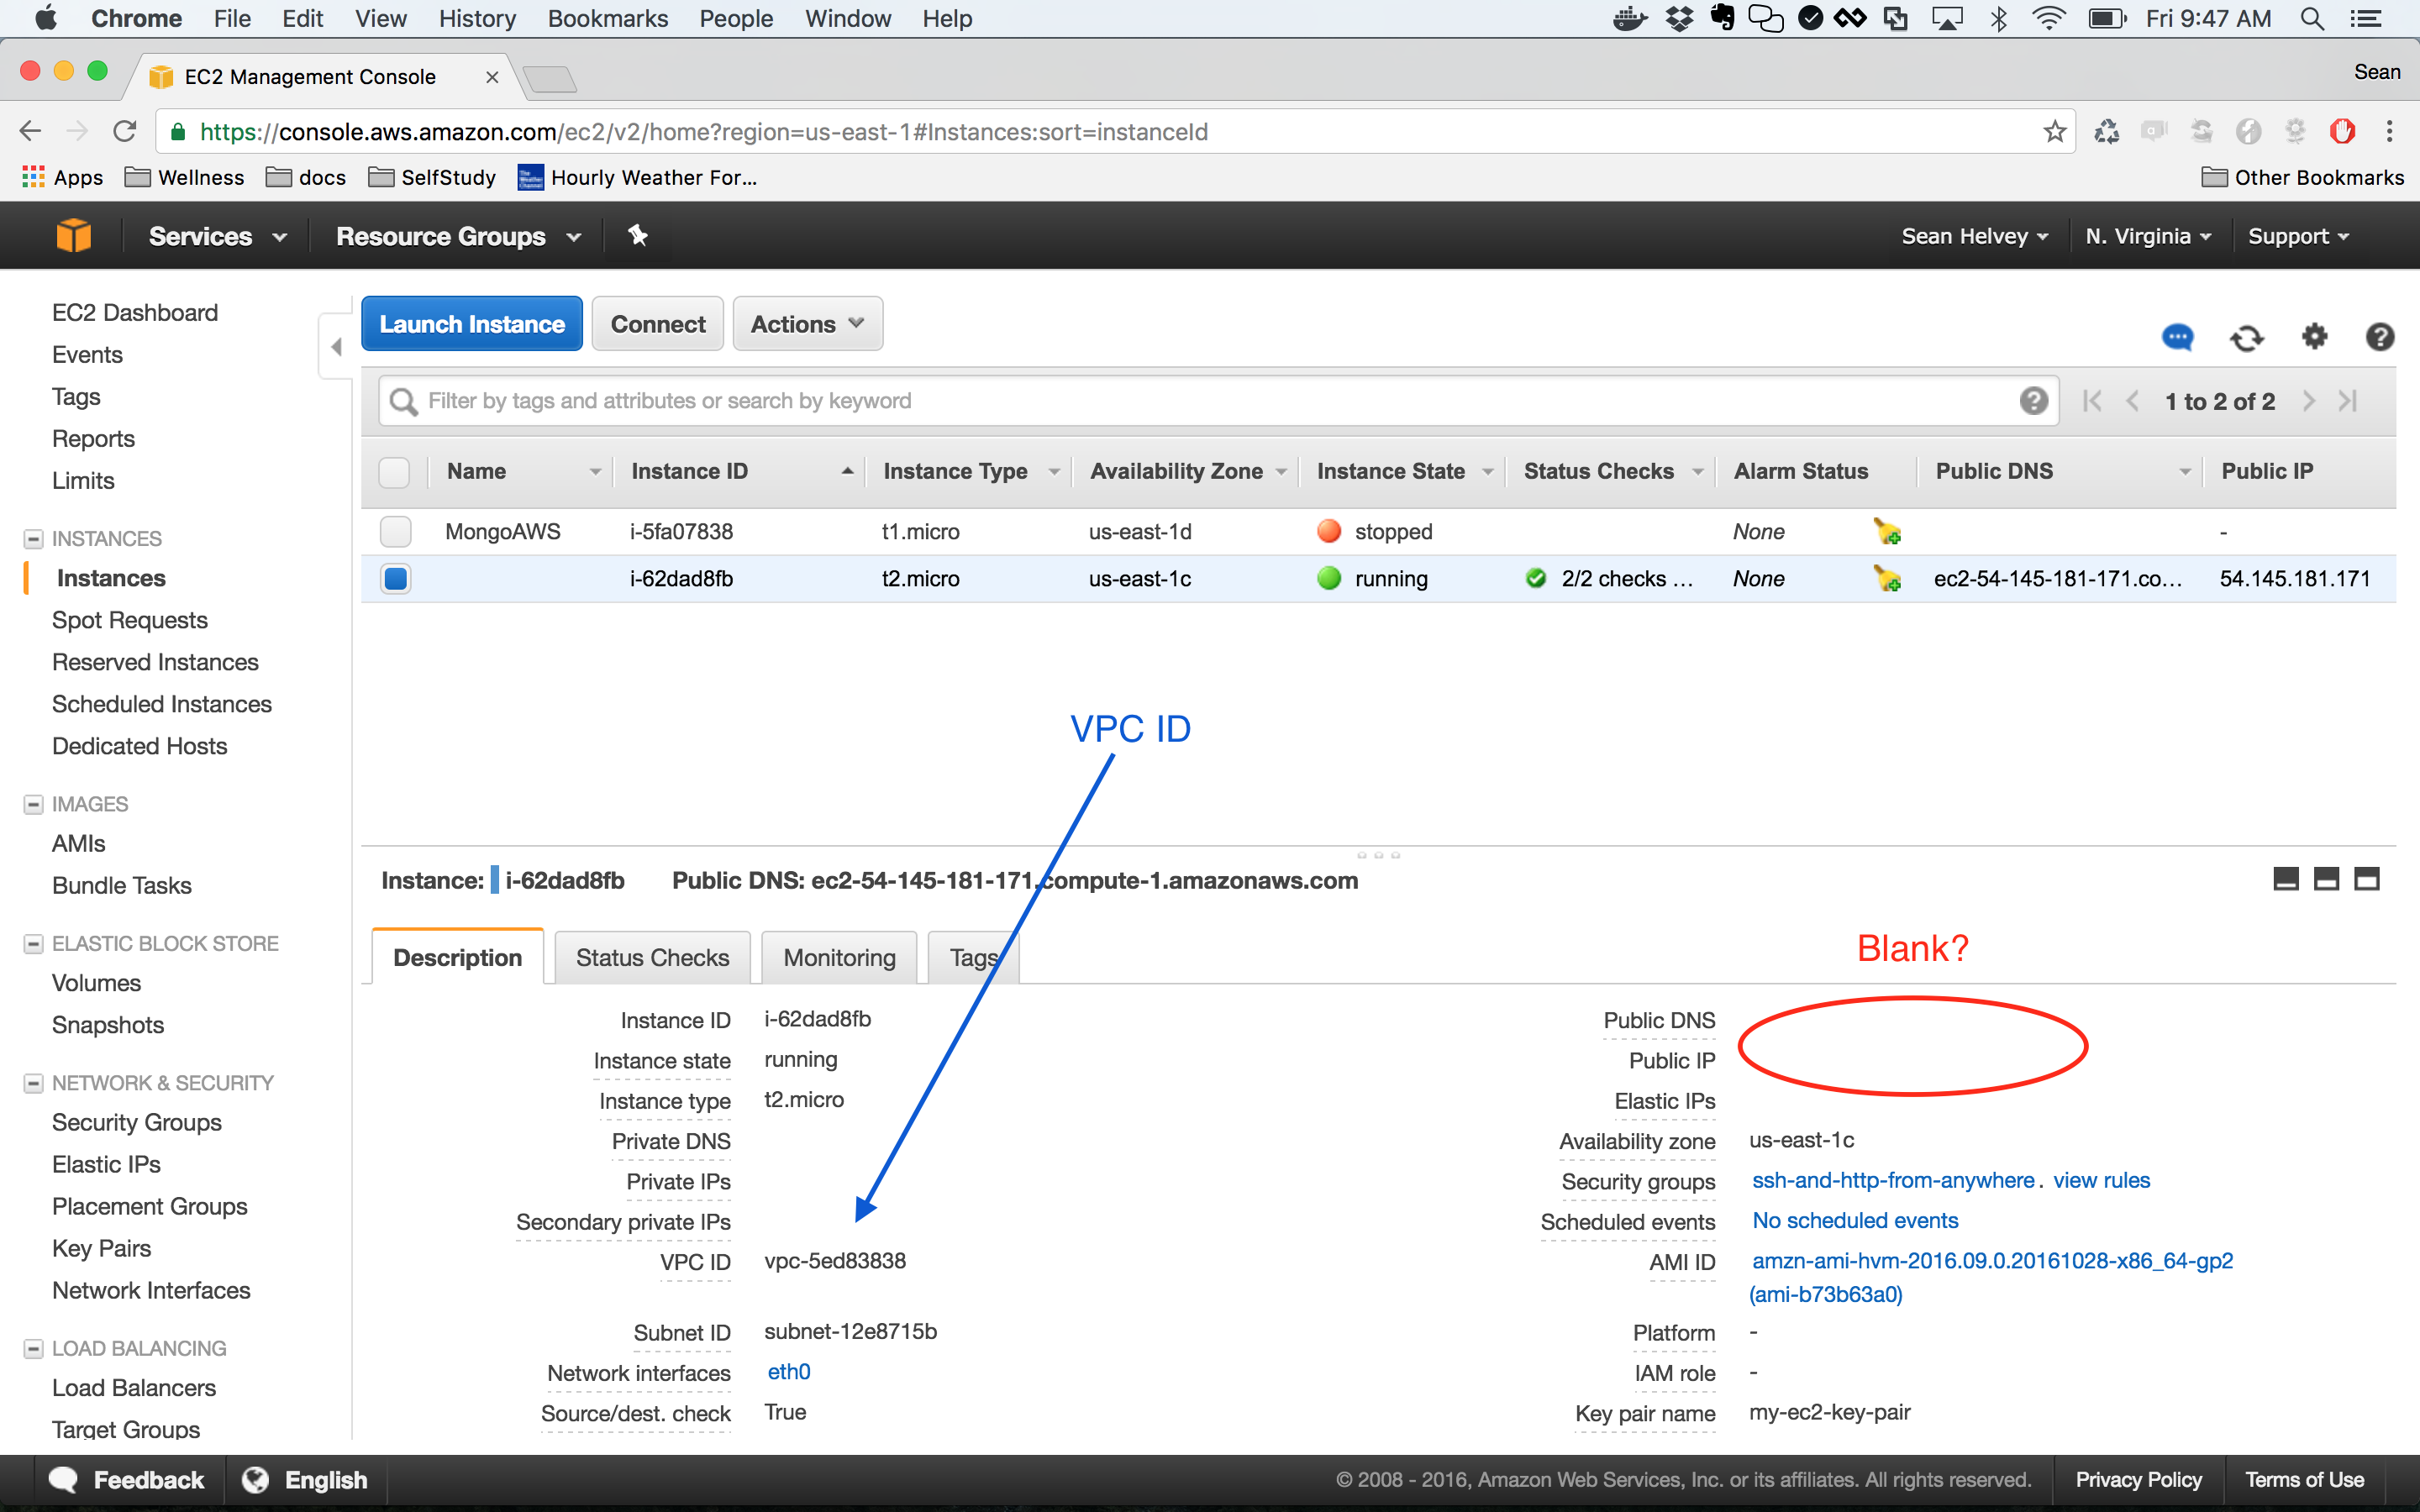
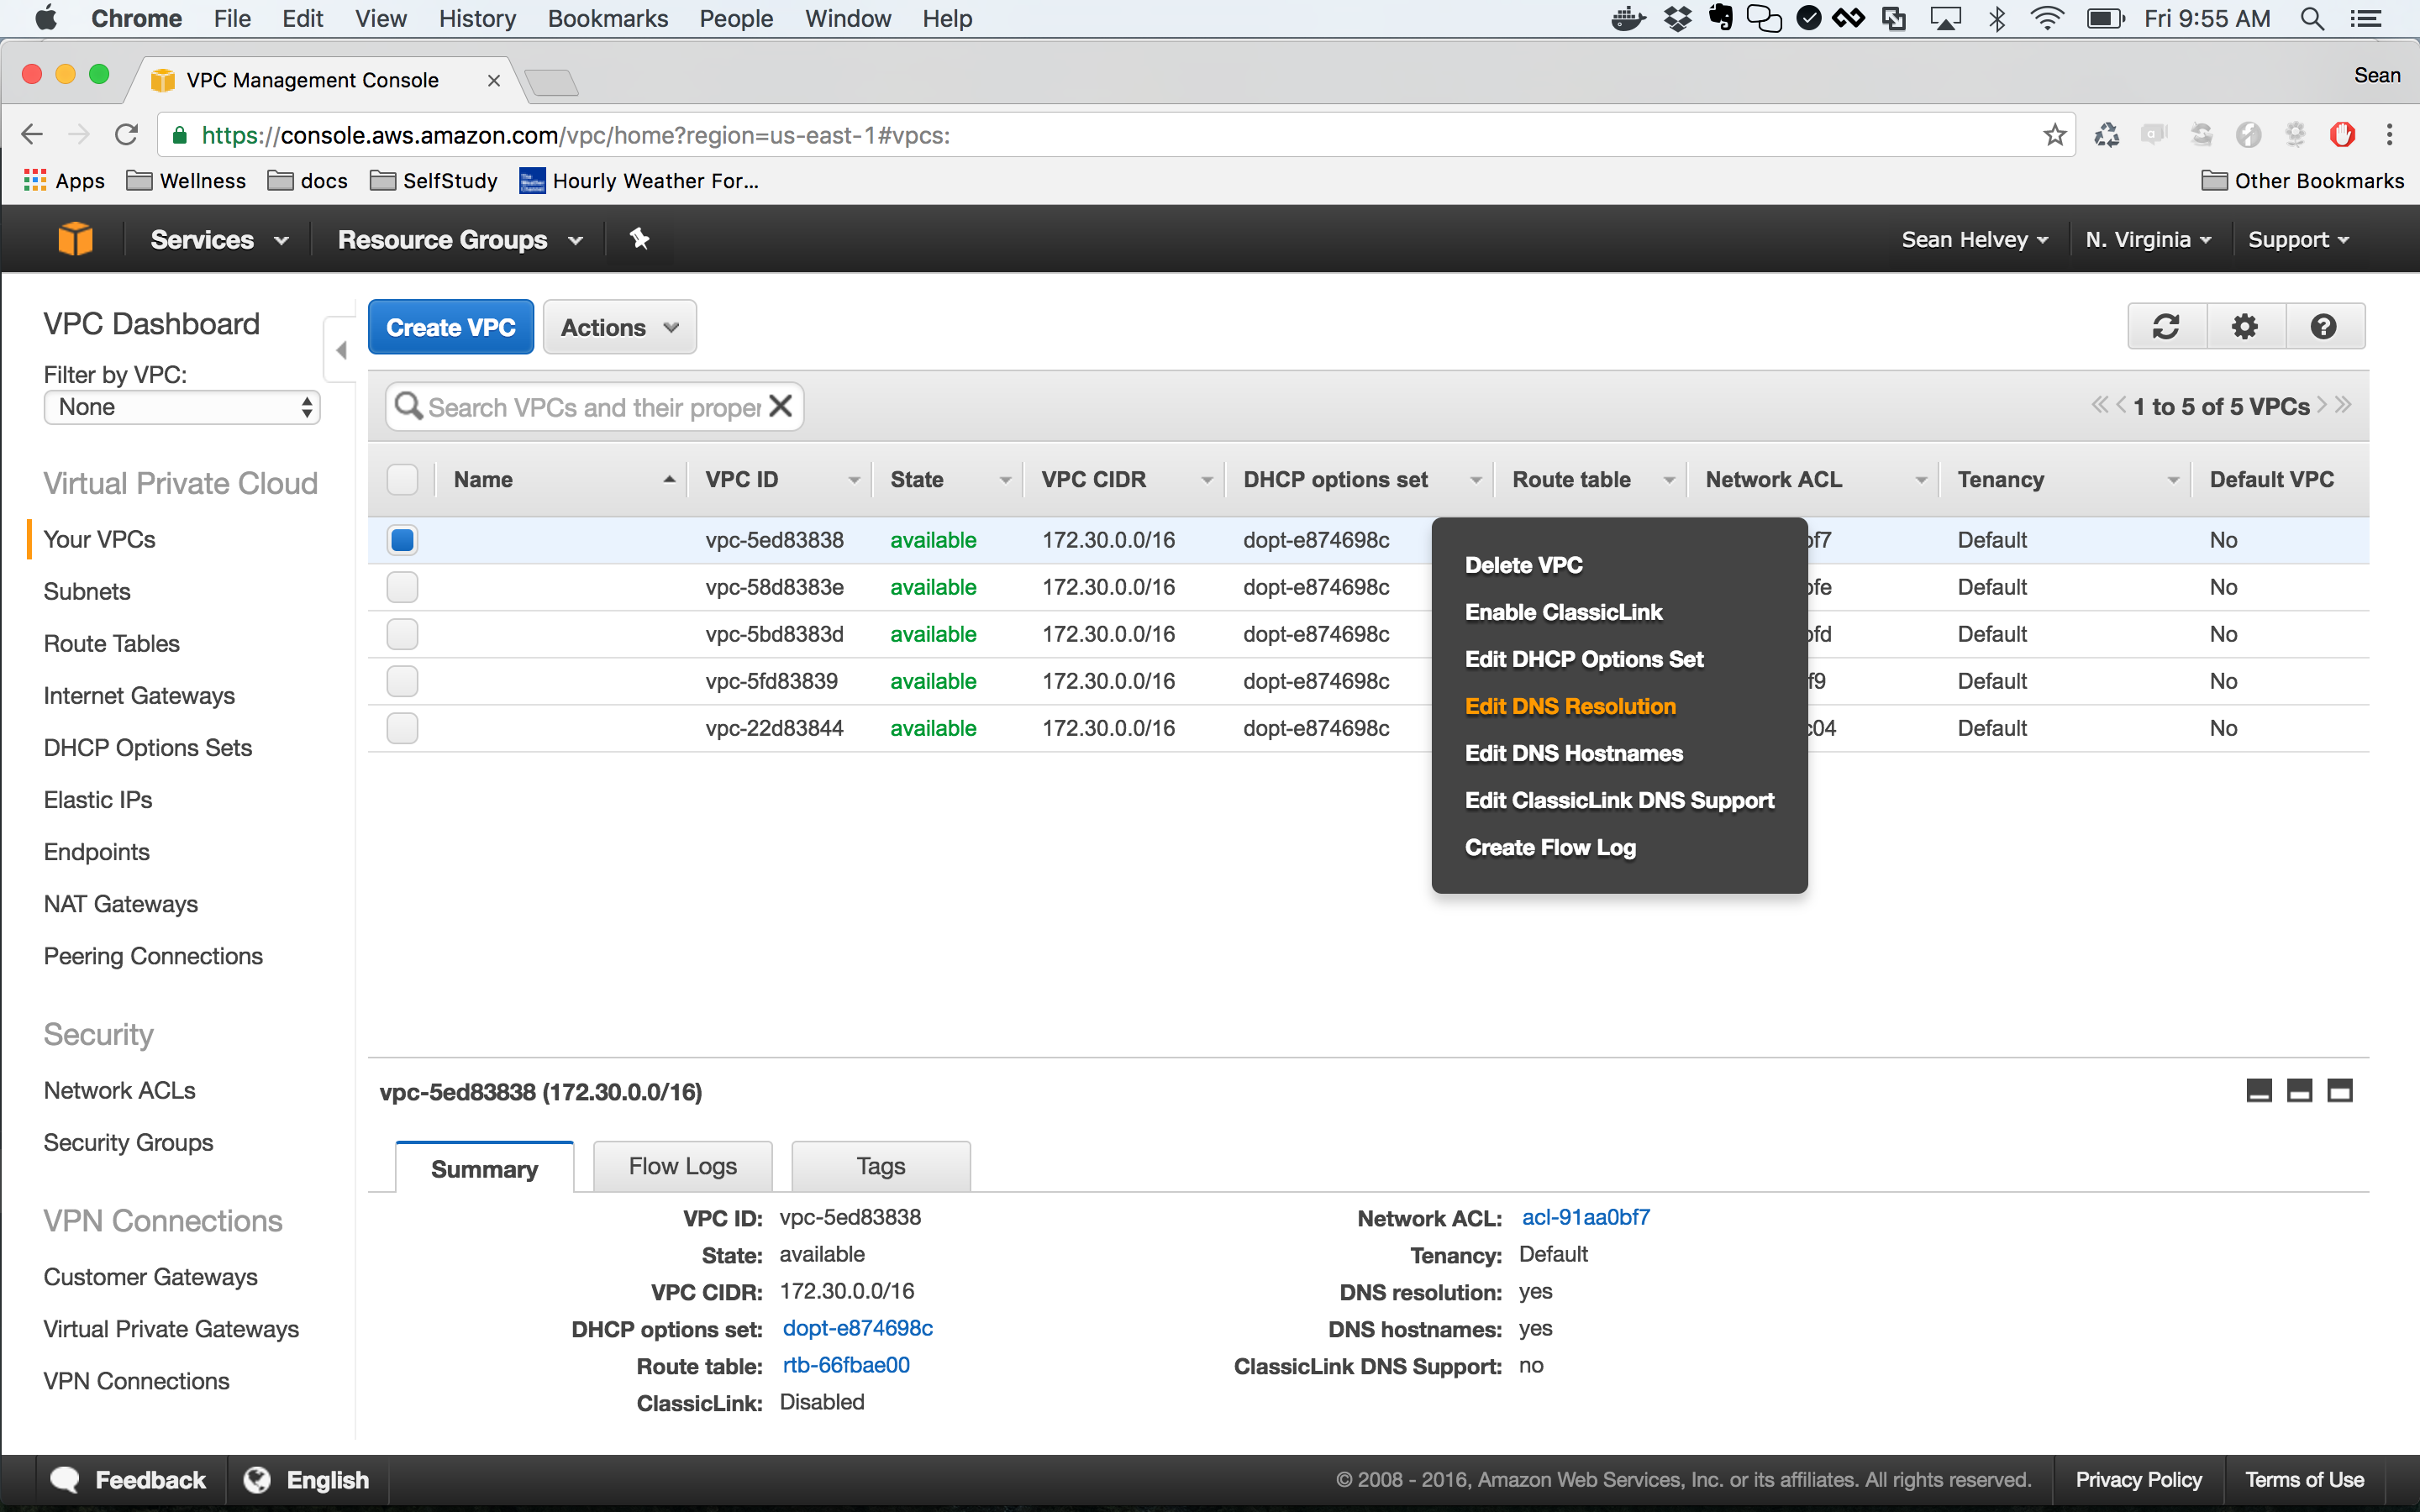
You probably used the VPC Wizard if this is your first Amazon EC2 instance. If that is the case and your Public DNS is blank, use the “Services” dropdown to navigate over to your VPC. Right click on the VPC ID that is associated with your instance and set the DNS resolution and DNS hostnames to “yes”.
Now head over to your Subnet using the navigation menu on the left and use the Subnet Actions dropdown to “Modify Auto-Assign Public IP” so that it is set to “yes”. Unfortuntely you will need to launch a new instance now in order for these two changes to take effect. Your newly launched instance will have beautifully populated Public DNS and Public IP fields.

The only remaining gotcha has to do with your Routes Tables and Internet Gateways, but it is well documented in this trouble shooting guide provided by Amazon: How do I troubleshoot problems connecting to my EC2 Linux instance using SSH? Once you have completed those steps, you should be able to connect to your shiny new EC2 instance!